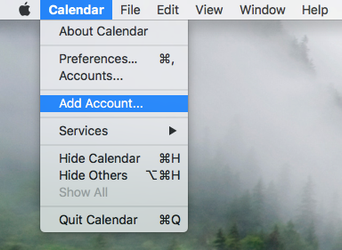
- Open up the Calendar application. At the top menu bar, click Calendar -> Add Account
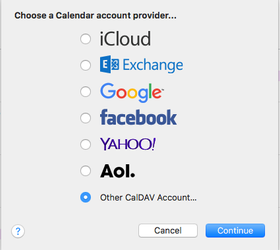
- Select Other CalDAV Account…
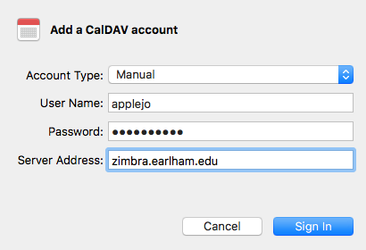
- Switch Account Type from Automatic to Manual. Enter your Earlham username, password, and enter “zimbra.earlham.edu” as the Server Address then click “Sign In”. The process of signing in and populating your Calendar may take several seconds.
Page Comparison
Manage space
Manage content
Integrations